Is that wobbly toilet flush handle a persistent nuisance in your bathroom? A loose toilet handle isn’t just an aesthetic annoyance; it can impact the efficiency of your toilet’s flush, sometimes leading to an incomplete flush or even a constantly running toilet if the lever isn’t returning to its proper position. Fortunately, fixing a loose toilet flush handle is one of the simplest and most rewarding DIY plumbing tasks you can undertake. With just a few basic tools and a few minutes of your time, you can restore stability to your toilet and prevent potential water waste.
Understanding the simple mechanics behind your toilet’s flush system and float valve can empower you to tackle common issues, saving you both money and the inconvenience of waiting for a professional. This guide will walk you through the straightforward process of tightening a loose flush handle, along with essential tips for maintaining the entire float valve mechanism, ensuring your toilet operates smoothly and efficiently for years to come.
Understanding Your Toilet’s Handle and Fill Valve Mechanisms
Before diving into the fix, it’s helpful to understand the key components within your toilet tank. While often conflated, the “float valve handle” can refer to two distinct parts, or a common misunderstanding of the toilet flush handle itself.
The Flush Lever Handle
|
Our Picks for the Best Electric pressure cooker in 2026
As an Amazon Associate I earn from qualifying purchases.
|
||
| Num | Product | Action |
|---|---|---|
| 1 | Sweetcrispy 16-in-1 Electric Pressure Cooker 6QT, 12-Preset Multi Cookers with Ceramic Pot, Slow Cook Rice Steamer Sauté Soup Yogurt Maker and More, Recipe Book |

|
| 2 | Midea 12-in-1 Electric Pressure Cooker, 8 Quarts, 12 Presets, Multi-Functional Programmable Slow Cooker, Rice Cooker, Steamer, Sauté Pan, Yogurt Maker, and More, Stainless Steel |
|
| 3 | NEWBULIG 16-in-1 Electric Pressure Cooker, 6QT Multi Cooker with 12 Presets, Slow Cook Rice Steamer Sauté Soup Meat Stew Canning Yogurt Maker, Ceramic Inner Pot & Recipe Book Included, Silver |
|
| 4 | Ninja HyperHeat 9-in-1 6.5-qt Pressure Cooker | Steams, Slow Cooks, Sears, Sautés, Sous Vide, Yogurt & More | With SimpliServe Pot | Powerful 1200-Watt | Blue Macaron | PC201 |
|
| 5 | DUMOS 16-in-1 Electric Pressure Cooker, 6QT Programmable Multi Cooker with 12 One-Touch Presets, Soup Steam Yogurt and More, Ceramic Inner Pot Delay Start & Keep Warm, Includes Recipe Guide, Black |
|
| 6 | Instant Pot Duo 7-in-1 Electric Pressure Cooker, Slow Cooker, Rice, Steamer, Sauté, Yogurt Maker, Warmer & Sterilizer, Includes App With Over 800 Recipes, Stainless Steel, 6 Quart |
|
| 7 | Sweetcrispy 16-in-1 Electric Pressure Cooker 6QT, 12-Preset Multi Cookers with Ceramic Pot, Slow Cook Rice Steamer Sauté Soup Yogurt Maker and More, Recipe Book |
|
| 8 | COSORI Pressure Cooker 6QT, Stainless Steel, 9-in-1 Multi Cooker, 12 Safety Features, Ceramic Inner Pot, Rice, Slow Cook, Sous Vide, Saute, 1100W |
|
| 9 | Instant Pot Duo 7-in-1 Electric Pressure Cooker, Slow Cooker, Rice Cooker, Steamer, Sauté, Yogurt Maker, Warmer & Sterilizer, Includes App with Over 800 Recipes, Stainless Steel, 8 Quart |
|
| 10 | Instant Pot Duo 7-in-1 Mini Electric Pressure Cooker, Slow Rice Cooker, Steamer, Sauté, Yogurt Maker, Warmer & Sterilizer, Includes Free App with over 1900 Recipes, Stainless Steel, 3 Quart |
|
This is the most common “handle” on your toilet – the lever you push down to flush. It extends through a hole in the front or side of the toilet tank and connects to a flush chain or rod inside. A plastic or metal nut on the inside of the tank typically secures the handle to the tank wall. When this nut loosens over time, the handle becomes wobbly or unresponsive.
The Fill Valve (Float Valve)
Distinct from the flush handle, the fill valve (often called a float valve) is the mechanism that refills your toilet tank after flushing. It comprises several designs:
- Ballcock Valve: An older design featuring a large floating ball attached to a rod, which rises and falls with the water level, shutting off the water when the tank is full.
- Float-Cup Valve: A more modern and common design where a floating cup moves up and down a vertical shaft. As the water level rises, the cup lifts, eventually closing the valve to stop water flow.
- Internal Float Valve: Similar to the float-cup, but the float mechanism is integrated directly into the valve’s shaft, often offering quieter operation and more precise shut-off.
While these fill valves have adjustment points to control the water level, they don’t typically have a “handle” that becomes loose in the same way a flush lever does. Issues with the float valve usually involve incorrect water levels, slow filling, or constant running, which often require adjustment or replacement rather than simple tightening. For the purpose of tightening a “loose handle,” the focus primarily remains on the flush lever.
Tools and Materials You’ll Need
Tackling a loose toilet flush handle requires minimal tools, most of which you likely already have around the house.
| Tool/Material | Purpose | Notes |
|---|---|---|
| Sponge or Cloth | Soaking up residual water in the tank. | Essential for keeping the work area dry. |
| Adjustable Wrench | Tightening the plastic or metal nut inside the tank. | Can also be a pair of pliers or channel locks. Ensure it fits the nut securely. |
| Screwdriver (Phillips or Flathead) | Potentially needed for a cap on the handle or a small set screw on some older models. | Not always necessary for the main tightening, but good to have on hand for older or unique handle designs. For caps, using a fingernail is often recommended to avoid scratches. |
| Rubber Gloves (Optional) | For hygiene and better grip. | The inside of a toilet tank is generally clean, but gloves can provide peace of mind and improve grip on wet or slippery parts. |
| Bucket (Optional) | To catch any water if you need to drain the tank completely. | Usually not needed for just tightening a handle, but useful if you decide to perform further maintenance or replace parts. |
| Rag/Paper Towels | For cleaning and drying. | Always handy for quick clean-ups. |
Step-by-Step Guide: How to Tighten a Loose Toilet Flush Handle
This DIY fix is straightforward and can be completed in under 15 minutes.
1. Prepare Your Workspace and Turn Off the Water
First, remove the lid of your toilet tank and set it aside in a safe place. Locate the water supply valve, usually on the wall behind or beneath the toilet, and turn it clockwise to shut off the water supply. This prevents the tank from refilling while you work. Next, flush the toilet to drain most of the water from the tank. Use a sponge or cloth to soak up any remaining water at the bottom of the tank, ensuring a dry working environment.
2. Locate the Securing Nut
Look at the inside of the toilet tank, directly behind where the flush handle is on the outside. You will see a large plastic or, less commonly, a metal nut threaded onto the handle’s shank. This nut holds the handle securely against the tank wall. If your handle is loose, this nut is likely loose as well. Note that for most toilet handles, this nut has reverse threading, meaning you turn it counter-clockwise to tighten and clockwise to loosen.
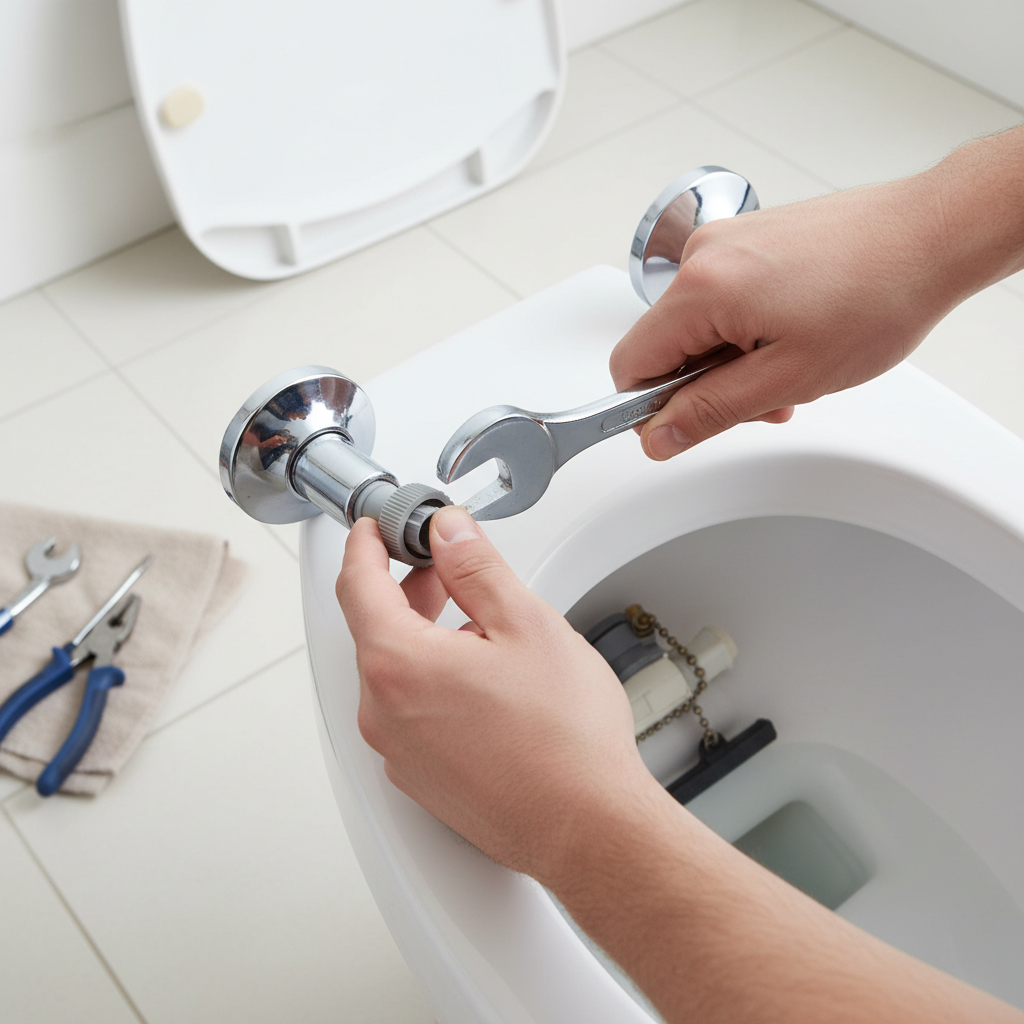
3. Tighten the Nut
Use your hand to initially tighten the nut as much as possible, turning it counter-clockwise. Once finger-tight, use an adjustable wrench or pliers to give it another quarter to half a turn. Be careful not to overtighten, especially if it’s a plastic nut, as this can crack the tank or the nut itself. The goal is to make the handle feel firm and stable, with no excessive wobble.
4. Test the Handle and Restore Water
With the nut tightened, test the handle’s stability. It should now feel secure. Turn the water supply valve back on by rotating it counter-clockwise. Allow the tank to refill completely, then flush the toilet a few times to ensure the handle operates smoothly and the tank refills correctly without leaks. Check around the handle’s connection point for any drips.
Addressing a Loose Float Arm or Fill Valve Adjustment
Sometimes, what appears to be a “loose float valve handle” might actually be an issue with the float arm itself or the overall fill valve setting, rather than the flush handle. These problems typically manifest as incorrect water levels, leading to weak flushes or a constantly running toilet.
Adjusting the Water Level
The water level in your tank should typically be about one inch below the top of the overflow tube (the vertical pipe in the center of the tank). If the water level is too high, it can leak into the overflow, causing a running toilet. If it’s too low, you’ll experience a weak flush.
- Ballcock Valves: For older ballcock designs, the water level is usually adjusted by bending the metal float arm up or down. Bending it down lowers the water level, and bending it up raises it.
- Float-Cup or Internal Float Valves: Most modern fill valves with a float cup or internal float have an adjustment screw or a height adjustment clip on the vertical shaft. Turning a screw (often with a Phillips or flathead screwdriver) or sliding a clip up or down will raise or lower the float cup, thereby adjusting the water level. Some models require twisting the top head of the fill valve counterclockwise to unlock, then sliding the entire valve up or down, and finally twisting clockwise to lock it back in place [cite: 1 (second block)].
Checking for Obstructions or Binding
If the float arm or cup isn’t moving freely, it might be sticking, causing improper water levels. Turn off the water supply and drain the tank as described above. Inspect the float mechanism for any mineral buildup, grit, or debris that might be hindering its movement [cite: 2 (second block)]. Clean the shaft and float cup with a brush and a general bathroom cleaner. Ensure nothing is obstructing the float’s path as it moves up and down.
“A loose flush handle is a common issue, often solvable with a quick twist of a nut. But always ensure your float valve is also correctly adjusted to maintain efficient water usage and prevent costly leaks.” – John Plumbing, Master Plumber and DIY Expert
Conclusion
A loose toilet flush handle is a minor annoyance that doesn’t have to become a major headache. By following these simple DIY steps, you can quickly tighten the securing nut inside your toilet tank, restoring stability and proper function to your flush lever. While primarily focused on the flush handle, understanding the basic operation and adjustment points of your toilet’s fill valve (float valve) can further equip you to handle common toilet issues, from adjusting water levels to preventing constant running.
Regularly checking the tightness of your toilet handle and ensuring your float valve is set to the correct water level are small preventative measures that can make a big difference in your bathroom’s efficiency. Don’t let a wobbly handle disrupt your daily routine; take charge with this easy fix and enjoy a perfectly functioning toilet. What other small DIY fixes have you tackled around your home that brought immense satisfaction?
Frequently Asked Questions
Why does my toilet handle keep getting loose?
Toilet handles often become loose due to the natural wear and tear from repeated use. The securing nut inside the tank can gradually loosen over time with the motion of flushing, causing the handle to wobble. This is a normal occurrence and typically an easy fix.
Can a loose toilet handle cause the toilet to run continuously?
Yes, a loose toilet handle can potentially cause your toilet to run continuously if it prevents the flush lever from fully returning to its upright position. This can leave the flapper slightly open, allowing water to slowly leak from the tank into the bowl, triggering the fill valve to constantly refill the tank.
What should I do if the plastic nut is stripped or broken?
If the plastic securing nut for your toilet handle is stripped or broken, you will need to replace it. These nuts are readily available at hardware stores and are relatively inexpensive. You may need to remove the handle assembly to replace the nut, ensuring you choose a replacement with the correct threading.
How do I know if my float valve needs adjustment, not just the handle tightened?
You’ll know your float valve needs adjustment if your toilet is consistently running (water level is too high and overflowing into the flush tube) or if your flushes are weak (water level is too low in the tank). A loose handle, on the other hand, makes the flush lever feel wobbly without necessarily affecting the water level directly.
Is it difficult to replace a toilet flush handle?
Replacing a toilet flush handle is also a relatively easy DIY task, often simpler than replacing other plumbing components. It typically involves unscrewing the old nut, detaching the chain, removing the old handle, inserting the new one, reattaching the chain, and securing it with the new nut.