The pressure cooker is a kitchen marvel, transforming tough cuts of meat into tender delights and dramatically cutting down cooking times. But few things are as frustrating as setting up your meal, closing the lid with anticipation, only to find your pressure cooker refusing to seal. The tell-tale hiss of escaping steam, the cooking cycle refusing to start, or an error code can quickly turn a quick meal into a culinary headache. This common issue, thankfully, often has simple solutions. Whether you own a classic stovetop model or a modern electric pressure cooker, understanding the culprits behind a faulty seal is the first step to getting back to effortless cooking. This guide will walk you through five easy fixes to troubleshoot why your pressure cooker isn’t sealing, ensuring your next meal is cooked to perfection.
Understanding Your Pressure Cooker’s Sealing Mechanism
At its core, a pressure cooker works by trapping steam, which raises the internal pressure and, consequently, the cooking temperature. This process relies on an airtight seal between the lid and the pot body. Several components contribute to this seal, primarily the flexible sealing ring (also known as a gasket), the float valve, and the steam release valve. When any of these elements are compromised—be it through wear, improper placement, or blockages—the cooker cannot build or maintain the necessary pressure. Recognising the role each part plays is key to diagnosing and fixing sealing problems.
The 5 Easy Fixes for a Non-Sealing Pressure Cooker
When your pressure cooker stubbornly refuses to seal, don’t despair. Most issues can be resolved with a quick inspection and adjustment. Here are the five most common reasons for sealing failure and straightforward solutions to get your appliance back in working order.
1. Inspect and Maintain Your Sealing Ring (Gasket)
The sealing ring, typically made of silicone or rubber, is the unsung hero of your pressure cooker’s sealing mechanism. It creates the crucial airtight barrier. Issues with this ring are the most frequent cause of sealing problems.
- Damage or Wear: Over time, sealing rings can become brittle, cracked, torn, or stretched. If you notice visible signs of damage, or if the ring feels hard, sticky, or unusually expanded, it’s time for a replacement. A simple “thumbnail test” can reveal brittleness: if pressing your thumbnail into the rubber leaves a permanent indent, it’s likely too old to function effectively. Many manufacturers recommend replacing the sealing ring annually for optimal performance.
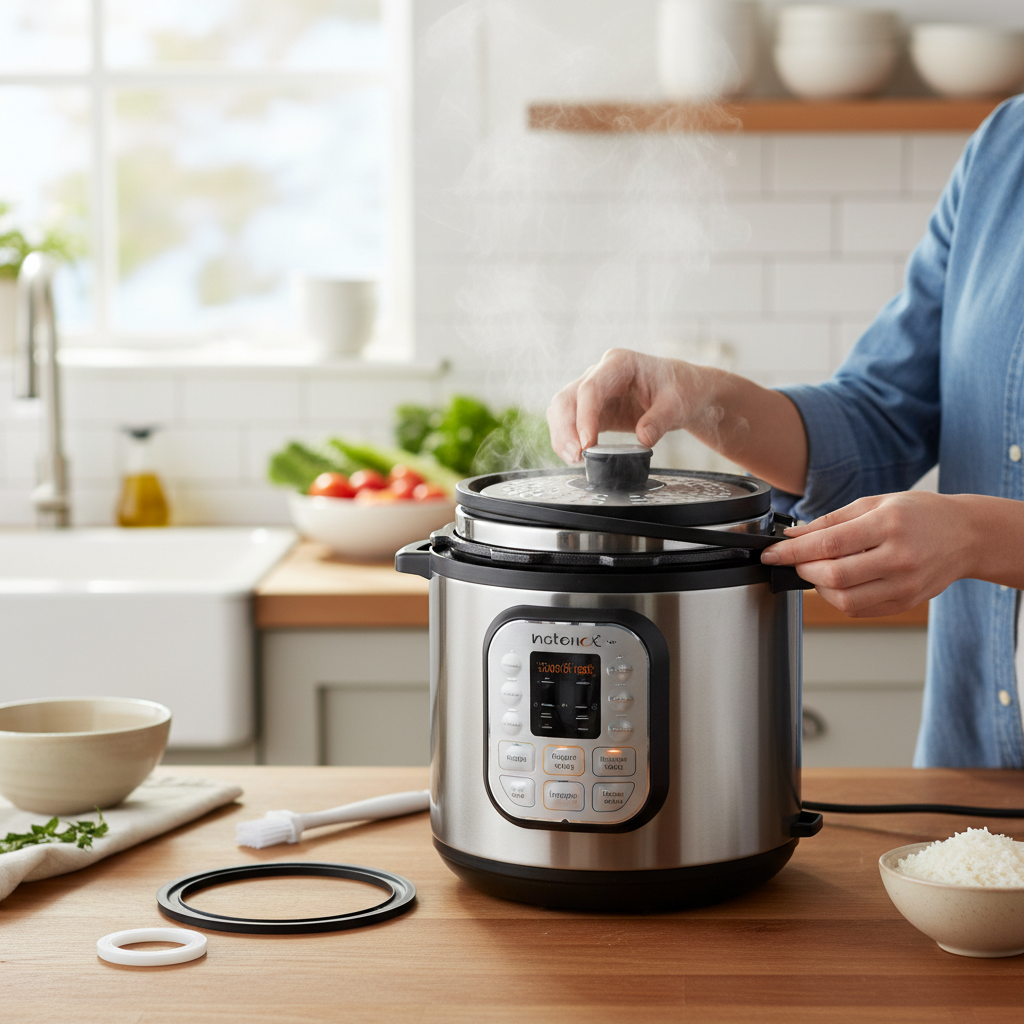
- Improper Placement: After cleaning, the sealing ring might not be seated correctly in the lid’s groove. Ensure it’s snugly fitted all the way around, without any twists or gaps. Sometimes, simply removing it, cleaning the groove and the ring, and then reinstalling it can solve the problem.
- Expansion from Heat: If you’ve just finished cooking and are attempting another batch, a warm sealing ring might still be expanded, making it difficult for the lid to seal. To quickly contract it, you can run it under cold water or even place it in the freezer for a few minutes.
- Food Debris: Small food particles stuck to the sealing ring or in its groove can break the seal. Always clean your sealing ring thoroughly after each use.
- Flipping the Gasket: Some users have found success by carefully flipping the sealing ring over, presenting a fresh surface to create a tighter seal. While not a permanent fix for a worn gasket, it can sometimes work in a pinch.
|
Our Picks for the Best Electric pressure cooker in 2026
As an Amazon Associate I earn from qualifying purchases.
|
||
| Num | Product | Action |
|---|---|---|
| 1 | NEWBULIG 16-in-1 Electric Pressure Cooker, 6QT Multi Cooker with 12 Presets, Slow Cook Rice Steamer Sauté Soup Meat Stew Canning Yogurt Maker, Ceramic Inner Pot & Recipe Book Included, Silver |

|
| 2 | Midea 12-in-1 Electric Pressure Cooker, 8 Quarts, 12 Presets, Multi-Functional Programmable Slow Cooker, Rice Cooker, Steamer, Sauté Pan, Yogurt Maker, and More, Stainless Steel |
|
| 3 | Sweetcrispy 16-in-1 Electric Pressure Cooker 6QT, 12-Preset Multi Cookers with Ceramic Pot, Slow Cook Rice Steamer Sauté Soup Yogurt Maker and More, Recipe Book |
|
| 4 | Sweetcrispy 16-in-1 Electric Pressure Cooker 6QT, 12-Preset Multi Cookers with Ceramic Pot, Slow Cook Rice Steamer Sauté Soup Yogurt Maker and More, Recipe Book |
|
| 5 | COSORI Pressure Cooker 6QT, Stainless Steel, 9-in-1 Multi Cooker, 12 Safety Features, Ceramic Inner Pot, Rice, Slow Cook, Sous Vide, Saute, 1100W |
|
| 6 | Instant Pot Duo 7-in-1 Mini Electric Pressure Cooker, Slow Rice Cooker, Steamer, Sauté, Yogurt Maker, Warmer & Sterilizer, Includes Free App with over 1900 Recipes, Stainless Steel, 3 Quart |
|
| 7 | DUMOS 16-in-1 Electric Pressure Cooker, 6QT Programmable Multi Cooker with 12 One-Touch Presets, Soup Steam Yogurt and More, Ceramic Inner Pot Delay Start & Keep Warm, Includes Recipe Guide, Black |
|
| 8 | Ninja HyperHeat 9-in-1 6.5-qt Pressure Cooker | Steams, Slow Cooks, Sears, Sautés, Sous Vide, Yogurt & More | With SimpliServe Pot | Powerful 1200-Watt | Blue Macaron | PC201 |
|
| 9 | Instant Pot Duo 7-in-1 Electric Pressure Cooker, Slow Cooker, Rice Cooker, Steamer, Sauté, Yogurt Maker, Warmer & Sterilizer, Includes App with Over 800 Recipes, Stainless Steel, 8 Quart |
|
| 10 | Instant Pot Duo 7-in-1 Electric Pressure Cooker, Slow Cooker, Rice, Steamer, Sauté, Yogurt Maker, Warmer & Sterilizer, Includes App With Over 800 Recipes, Stainless Steel, 6 Quart |
|
“A properly maintained sealing ring is the lifeline of your pressure cooker. Neglect it, and you’re inviting steam leaks and cooking delays.” – Chef Elena Rodriguez, Pressure Cooking Expert
2. Verify and Clean Pressure Valves
Pressure cookers, especially electric models, rely on several valves to regulate pressure. A malfunction in any of these can prevent proper sealing.
- Steam Release Valve/Handle: This valve, often located on top of the lid, must be set to the “Sealing” or “Closed” position for the cooker to build pressure. If it’s accidentally left on “Venting” or “Open,” steam will escape, and the cooker won’t seal. Always double-check its position before starting.
- Float Valve/Pin: This small metal pin, usually found near the steam release valve, rises when pressure builds inside the cooker, indicating it’s sealed. If it’s stuck in the down position, blocked by food debris, or missing entirely, the cooker cannot seal. Carefully remove, clean, and reinsert the float valve, ensuring it can move freely. The anti-block shield, often a small metal cap over the float valve mechanism inside the lid, should also be kept clean.
3. Ensure Proper Lid Alignment and Closure
A perfectly seated lid is fundamental to achieving an airtight seal. Even a slight misalignment can allow steam to escape.
- Lid Positioning: Ensure the lid is correctly aligned with the pot body and twisted/locked into place according to your model’s instructions. Some models have alignment arrows or indicators to guide you. If you have trouble closing the lid, especially if the pot’s contents are hot, try releasing any existing steam or letting the pot cool slightly, then reattempting to close it.
- Lid or Pot Deformation: In rare cases, the pressure cooker body or lid might become warped or dented due to impacts or improper handling. Even a minor deformation around the rim can prevent a proper seal. Visually inspect both the lid and the pot for any irregularities. If significant damage is present, replacement of the affected part or the entire cooker may be necessary.
- Locking Pin: Some pressure cookers feature a lid locking pin that engages once pressure builds. If this pin is stuck or broken, it might prevent the lid from fully seating or the cooker from signaling it’s sealed. Check for free movement and cleanliness.
4. Check Liquid Levels and Avoid Overfilling
The pressure cooker needs liquid to generate the steam necessary for pressure buildup. Without sufficient liquid, it simply cannot reach pressure.
- Insufficient Liquid: Always refer to your pressure cooker’s manual or recipe for the minimum liquid requirements. Too little liquid will cause the cooker to struggle to build pressure, often resulting in a “burn” message on electric models as the heat builds without steam. Add enough liquid to cover the base of the pot and generate steam.
- Overfilling: Conversely, overfilling your pressure cooker can also hinder sealing. Most pressure cookers have a maximum fill line (usually two-thirds full for most foods, and half-full for foods that expand, like beans or rice). Exceeding this line can lead to food blocking valves or preventing the lid from sealing properly.
5. Clear Any Food Debris or Scorch Marks
What’s inside your pressure cooker can directly impact its ability to seal and function safely.
- Food Scorch: If food has scorched and stuck to the bottom of the inner pot, it can interfere with the heat distribution and prevent the cooker from building pressure. This often triggers a “burn” error. Always ensure the bottom of the pot is clean before cooking.
- Debris on Rim: Even small bits of food or residue on the rim of the pot or the lid’s underside, where the sealing ring makes contact, can create gaps, allowing steam to escape. A thorough wipe-down of all contact surfaces before closing the lid is a simple but effective preventative measure.
- Thick Liquids: Very thick sauces or purees can sometimes prevent the float valve from rising or clog the steam release. If your recipe calls for thick ingredients, consider diluting them slightly or ensuring they are not directly contacting the valves.
When to Consider Professional Help or Replacement
While these five fixes cover most common sealing issues, there are instances where the problem might be more severe. If you’ve tried all the troubleshooting steps and your pressure cooker still won’t seal, or if you notice significant damage like major dents, deep cracks, or a broken locking mechanism that cannot be easily replaced, it might be time to consult a professional repair service or consider investing in a new unit. Safety is paramount with pressure cookers, so never attempt to force a seal or bypass safety features.
Conclusion
A non-sealing pressure cooker can be a vexing problem, but more often than not, the solution is straightforward. By systematically checking your sealing ring, inspecting valves, ensuring proper lid alignment, verifying liquid levels, and keeping the unit free of debris, you can resolve most sealing issues quickly. Regular cleaning and maintenance are key to prolonging the life of your electric pressure cooker and ensuring it continues to deliver delicious, time-saving meals. Don’t let a faulty seal deter you; empower yourself with these easy fixes and enjoy the unparalleled efficiency of pressure cooking. What’s your go-to pressure cooker meal when yours is working perfectly?
Frequently Asked Questions
How often should I replace my pressure cooker’s sealing ring?
It is generally recommended to replace your pressure cooker’s sealing ring every 12 to 24 months, or sooner if you notice any signs of wear, cracking, hardening, or stickiness. Frequent use or washing in a dishwasher can shorten its lifespan. Keeping a spare ring on hand is a good practice.
Why does my Instant Pot display a “burn” message and not seal?
A “burn” message on an Instant Pot often indicates that the bottom of the inner pot is too hot, usually due to insufficient liquid, food stuck to the bottom, or very thick liquids that prevent steam buildup. Ensure you have enough thin liquid and the pot’s bottom is clean to allow it to seal properly.
Can a dirty lid prevent a pressure cooker from sealing?
Yes, absolutely. Even small food particles, grease, or residue on the rim of the pot, the sealing ring, or within the valve mechanisms can create tiny gaps that prevent an airtight seal. Always ensure all components, especially those involved in sealing, are clean before use.
What if my pressure cooker lid is stuck after cooking?
If your pressure cooker lid is stuck, it usually means there’s still some pressure inside. Never try to force it open. Ensure the pressure release valve is fully open and all pressure has been safely released (the float valve should drop). If it’s still stuck, let the cooker cool down completely, which will typically release any remaining residual pressure and allow the lid to open.
Is it safe to use a pressure cooker that leaks a little steam?
No, it is not safe or efficient to use a pressure cooker that leaks steam around the lid during the pressure-building phase. A leaking seal means the cooker cannot build or maintain proper pressure, which will result in undercooked food and potential safety hazards. Address the leak immediately using troubleshooting steps.