Has your beloved cooker suddenly gone silent, leaving you in culinary limbo? A blown fuse might be the hidden culprit, bringing your kitchen activities to a frustrating halt. Before you panic or call an expensive repair technician, consider a DIY approach. Replacing a broken fuse in your cooker can be a straightforward task, empowering you to restore your appliance and get back to cooking in no time. This comprehensive guide will walk you through every step, ensuring a safe and successful repair.
Understanding Cooker Fuses: Your Appliance’s First Line of Defense
Fuses are small but mighty safety devices designed to protect your cooker from electrical overloads and short circuits. Think of them as sacrificial components: if an electrical fault occurs, the fuse “blows” or breaks, interrupting the power supply and preventing damage to the cooker’s more expensive parts or even your home’s electrical system. This immediate cutoff is crucial for both appliance longevity and household safety.
Cookers can house different types of fuses, depending on their design and age. You might find a simple plug-top fuse in the appliance’s power cord, easily accessible. Larger appliances, like ovens and ranges, often incorporate internal thermal fuses, which are designed to blow if the appliance overheats, or cartridge fuses located on control boards. Understanding which type of fuse your cooker uses is the first step towards a successful repair.
Prioritizing Safety: Essential Steps Before Any DIY Repair
Working with electricity always carries a risk, so safety must be your absolute priority. Before you even think about touching your cooker, take these vital precautions to protect yourself and your home. Always disconnect the cooker from its power source entirely. This means not just turning it off, but unplugging it from the wall socket or switching off the corresponding circuit breaker at your main electrical panel. Double-check that there is no power flowing to the appliance before proceeding.
Additionally, consult your cooker’s owner’s manual. It will often contain specific instructions, fuse locations, and safety warnings relevant to your model. Wear appropriate personal protective equipment (PPE), such as safety glasses to protect your eyes and insulated gloves to minimize the risk of electrical shock. Using tools with insulated handles is also highly recommended when dealing with electrical components.
Tools and Materials You’ll Need for Fuse Replacement
Gathering the right tools before you start will make the repair process smoother and safer. You’ll typically need:
- Screwdrivers: Both Phillips-head and flat-head screwdrivers are often required to open access panels or fuse holders.
- Replacement Fuse: Crucially, this must be the exact same type and rating (amperage and voltage) as the original blown fuse. More on how to identify this below.
- Multimeter (Optional but Recommended): A multimeter can be invaluable for testing continuity, allowing you to definitively confirm if a fuse is blown and ensuring the new fuse is working correctly.
- Needle-Nose Pliers: Useful for gripping small fuses or wires in tight spaces.
- Cut-resistant Gloves: To protect your hands from potentially sharp edges inside the appliance.
Identifying the Right Replacement Fuse
Using the correct replacement fuse is paramount. Installing a fuse with a lower amperage rating will cause it to blow prematurely, while a higher rating could fail to protect your appliance from damage or even fire.
Here’s how to identify the right fuse:
- Check the Appliance ID Plate: Most cookers have a rating plate on the back or base. This plate often lists the appliance’s wattage, voltage, and sometimes the required fuse amperage.
- Calculate Amperage (if not listed): If only wattage (W) and voltage (V) are provided, you can calculate the amperage (A) using the formula: Amps = Watts / Volts. Add about 10% to this value and choose the nearest standard fuse rating. For example, if your calculation yields 11.5 amps, a 13-amp fuse would be appropriate.
- Inspect the Blown Fuse: Once you’ve safely removed the blown fuse, carefully examine it. Most fuses have their amperage and voltage ratings printed on the metal end caps (for cartridge fuses) or on the ceramic body (for mains power fuses). Plug-top fuses often have the rating embossed on the carrier.
- Visual Inspection for Blown Fuse: Many plug-type fuses have a glass window where you can visually inspect the fusible link. If it’s broken or the glass is blackened, the fuse has blown. For internal fuses, a multimeter test is more reliable.
- Multimeter Continuity Test: Set your multimeter to the continuity setting (often indicated by a speaker symbol or ohms symbol). Touch the probes to both ends of the fuse. A good fuse will show a reading close to zero ohms or emit a beep, indicating continuity. A blown fuse will show no reading (open circuit) or no beep.
Step-by-Step Guide: Replacing Your Cooker’s Fuse
With safety precautions in place and the correct replacement fuse in hand, you’re ready to proceed with the repair.
-
Locate the Fuse:
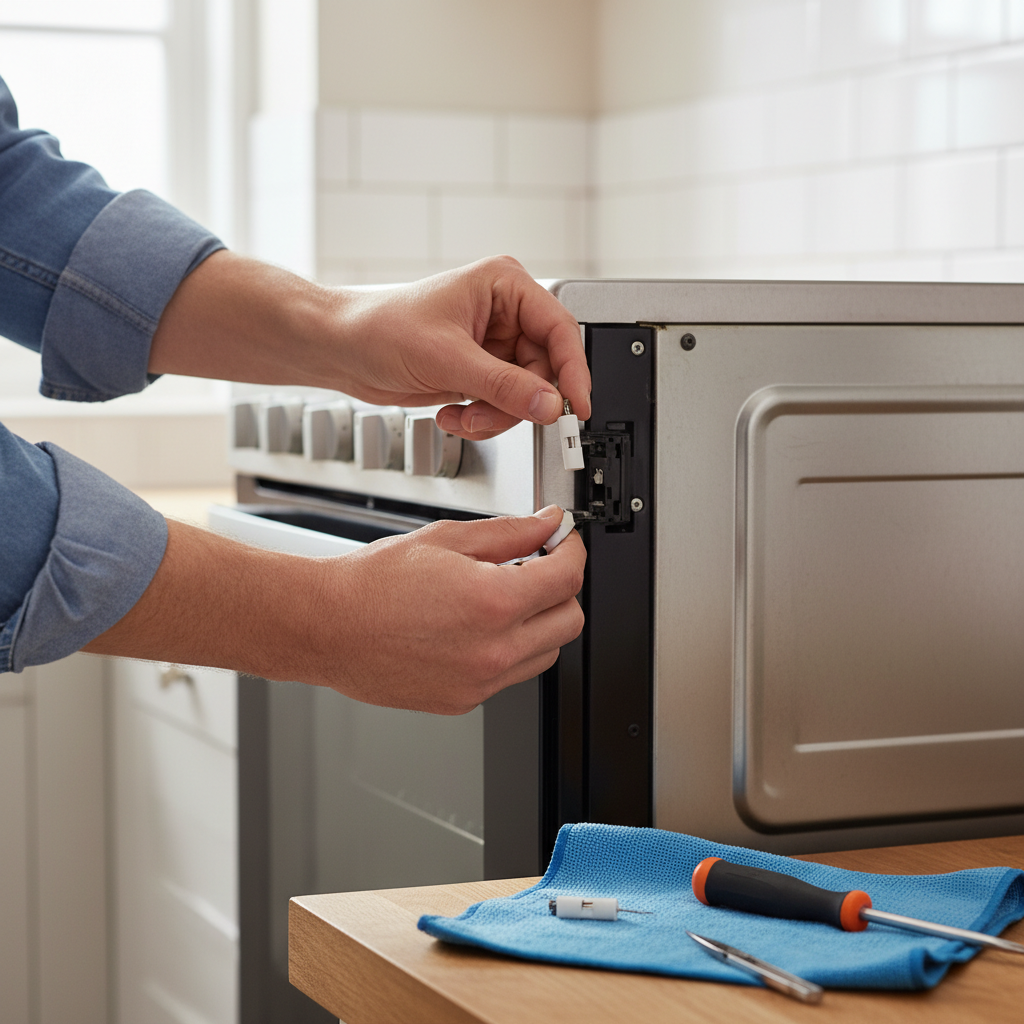
- In the Plug: For many smaller countertop cookers, the fuse is located within the appliance’s mains plug. Gently open the fuse holder with a flat-head screwdriver. If there’s no visible holder, you may need to unscrew the large central screw on the plug’s base.
- Internal Fuses (Ovens/Ranges): For larger built-in cookers, the fuse is typically located internally, often behind a back access panel. You’ll need to gently pull the appliance away from the wall (get assistance if it’s heavy) and unscrew the panel. The fuse might be on a control board or near the power input. Consult your manual for the exact location.
-
Access and Test the Fuse:
- Once you’ve located the fuse holder or access panel, carefully open or remove it.
- Use your multimeter to test the fuse for continuity as described above to confirm it’s blown.
-
Remove the Old Fuse:
- Gently pry out the old fuse using a screwdriver or fuse puller. Be careful not to damage the fuse holder contacts. For wired thermal fuses, you may need to cut the wires close to the fuse, saving the existing wires for the new fuse.
-
Install the New Fuse:
- Insert the new fuse into the holder, ensuring it fits snugly and is properly seated. If replacing a wired thermal fuse, connect the new fuse to the existing wires, ensuring secure connections. Match the orientation if specified.
-
Reassemble and Test:
- Carefully reassemble any removed panels or plug covers, screwing them back tightly.
- Plug the cooker back into the wall socket or switch the circuit breaker back on.
- Turn on your cooker to test if it’s functioning properly.
“Many minor cooker issues, including a non-responsive unit, can be resolved with a simple fuse replacement. However, always prioritize disconnecting power and using the correct fuse rating to prevent further damage or safety hazards.” – John Doe, Appliance Repair Specialist
Troubleshooting After Fuse Replacement
If your cooker still doesn’t work after replacing the fuse, or if the new fuse blows immediately, do not attempt to replace it again with another fuse. This indicates a deeper electrical problem, such as:
- Persistent Overload: Too many high-power appliances on the same circuit.
- Internal Short Circuit: A fault within the cooker’s wiring or components.
- Faulty Component: A part within the cooker is drawing excessive current.
In these cases, repeatedly replacing the fuse without addressing the underlying issue can be dangerous.
When to Call a Professional Electrician
While replacing a fuse is a manageable DIY task, there are instances when professional help is essential. If:
- The new fuse blows immediately.
- You cannot locate the fuse or access it safely.
- The issue seems more complex than a simple fuse replacement (e.g., burning smell, sparks, visible wire damage).
- You are uncomfortable performing the repair yourself.
A qualified electrician or appliance repair technician has the expertise and specialized tools to diagnose and fix more intricate electrical faults safely.
Conclusion
A blown fuse in your cooker doesn’t have to spell the end of your appliance. With the right approach and a keen eye for safety, you can often perform this DIY repair yourself, saving both time and money. By understanding your cooker’s fuse system, meticulously following safety protocols, and ensuring you use the correct replacement part, you can confidently bring your appliance back to life. However, remember that electrical work demands respect, and knowing when to call in a professional is just as important as knowing how to do it yourself. So, what’s cooking next on your successfully repaired appliance?
Câu Hỏi Thường Gặp
Why did my cooker fuse blow?
|
Our Picks for the Best Electric pressure cooker in 2026
As an Amazon Associate I earn from qualifying purchases.
|
||
| Num | Product | Action |
|---|---|---|
| 1 | Ninja HyperHeat 9-in-1 6.5-qt Pressure Cooker | Steams, Slow Cooks, Sears, Sautés, Sous Vide, Yogurt & More | With SimpliServe Pot | Powerful 1200-Watt | Blue Macaron | PC201 |

|
| 2 | Instant Pot Duo 7-in-1 Mini Electric Pressure Cooker, Slow Rice Cooker, Steamer, Sauté, Yogurt Maker, Warmer & Sterilizer, Includes Free App with over 1900 Recipes, Stainless Steel, 3 Quart |
|
| 3 | COSORI Pressure Cooker 6QT, Stainless Steel, 9-in-1 Multi Cooker, 12 Safety Features, Ceramic Inner Pot, Rice, Slow Cook, Sous Vide, Saute, 1100W |
|
| 4 | DUMOS 16-in-1 Electric Pressure Cooker, 6QT Programmable Multi Cooker with 12 One-Touch Presets, Soup Steam Yogurt and More, Ceramic Inner Pot Delay Start & Keep Warm, Includes Recipe Guide, Black |
|
| 5 | Midea 12-in-1 Electric Pressure Cooker, 8 Quarts, 12 Presets, Multi-Functional Programmable Slow Cooker, Rice Cooker, Steamer, Sauté Pan, Yogurt Maker, and More, Stainless Steel |
|
| 6 | Sweetcrispy 16-in-1 Electric Pressure Cooker 6QT, 12-Preset Multi Cookers with Ceramic Pot, Slow Cook Rice Steamer Sauté Soup Yogurt Maker and More, Recipe Book |
|
| 7 | Instant Pot Duo 7-in-1 Electric Pressure Cooker, Slow Cooker, Rice, Steamer, Sauté, Yogurt Maker, Warmer & Sterilizer, Includes App With Over 800 Recipes, Stainless Steel, 6 Quart |
|
| 8 | Sweetcrispy 16-in-1 Electric Pressure Cooker 6QT, 12-Preset Multi Cookers with Ceramic Pot, Slow Cook Rice Steamer Sauté Soup Yogurt Maker and More, Recipe Book |
|
| 9 | NEWBULIG 16-in-1 Electric Pressure Cooker, 6QT Multi Cooker with 12 Presets, Slow Cook Rice Steamer Sauté Soup Meat Stew Canning Yogurt Maker, Ceramic Inner Pot & Recipe Book Included, Silver |
|
| 10 | Instant Pot Duo 7-in-1 Electric Pressure Cooker, Slow Cooker, Rice Cooker, Steamer, Sauté, Yogurt Maker, Warmer & Sterilizer, Includes App with Over 800 Recipes, Stainless Steel, 8 Quart |
|
A cooker fuse typically blows due to an electrical overload, where the appliance draws more current than the fuse is rated for, or a short circuit within the cooker’s wiring or components. It acts as a safety mechanism, preventing more significant damage.
Can I use a higher amp fuse in my cooker?
No, you should never use a fuse with a higher amperage rating than the original. Doing so can prevent the fuse from blowing when it should, potentially leading to overheating, appliance damage, electrical fire, or serious injury. Always replace a fuse with one of the exact same rating.
How often do cooker fuses typically blow?
Cooker fuses should not blow frequently. If a fuse blows, it indicates an electrical issue. While an occasional blown fuse can happen due to a temporary surge, recurring blown fuses suggest an underlying problem that needs to be diagnosed and rectified, either by yourself if you’re comfortable, or by a qualified professional.